

Setting up the employee schedule is a crucial step because this dictates if a particular staff will work on a certain day or if he is on leave or is off duty.
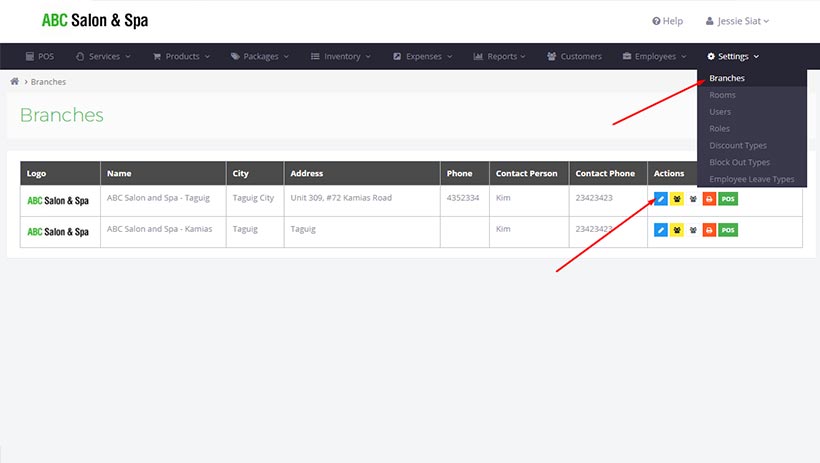
1.) Go to Branches under the Settings Menu and click the blue Edit icon.
2.) Set Branch Opening and Closing Time
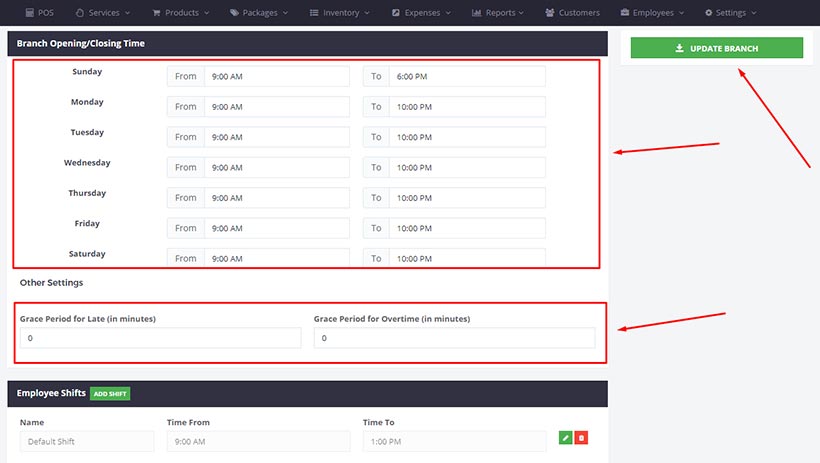
– Set your branch opening time and closing time from Sunday to Saturday in the Working Hours module.
– If you have grace periods for lates and overtime, type it in the Other Settings. If none, just put 0 (zero).
– Click the UPDATE BRANCH button
3.) Create Employee Shifts
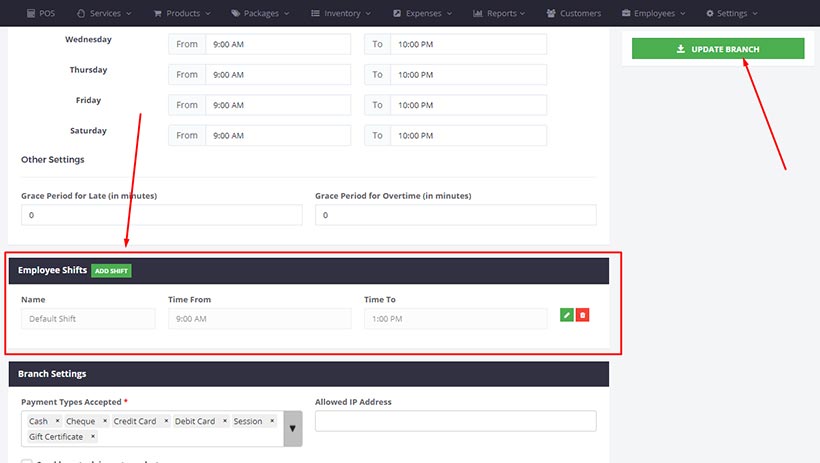
– Under the Employee Shifts Module click the ADD SHIFT button and type the shift name and time. You can add as many shifts as you want.
– Click the UPDATE BRANCH button
4.) Go to the EMPLOYEE SCHEDULE page under the EMPLOYEES main menu.
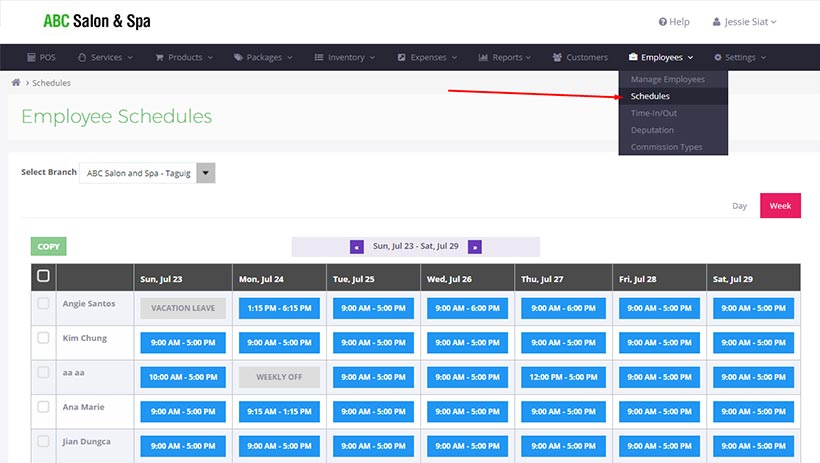
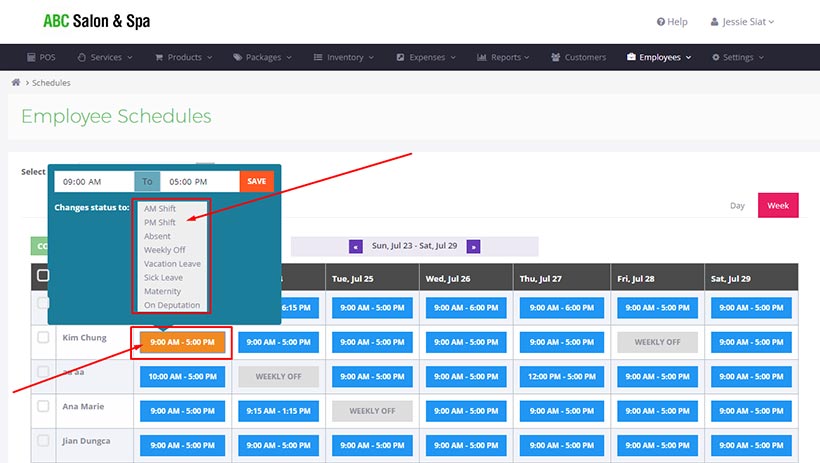
5.) Update the schedule of each of your employees by clicking the blue boxes and selecting the staff’s appropriate shift / leave / off
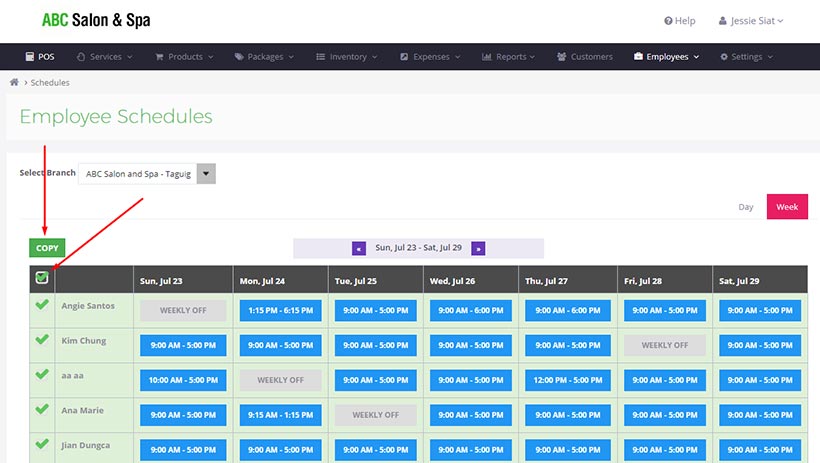
6.) Optionally, if your weekly schedule is the same, you may click the Select All box and Click the COPY button to copy the schedule for the next couple of weeks.
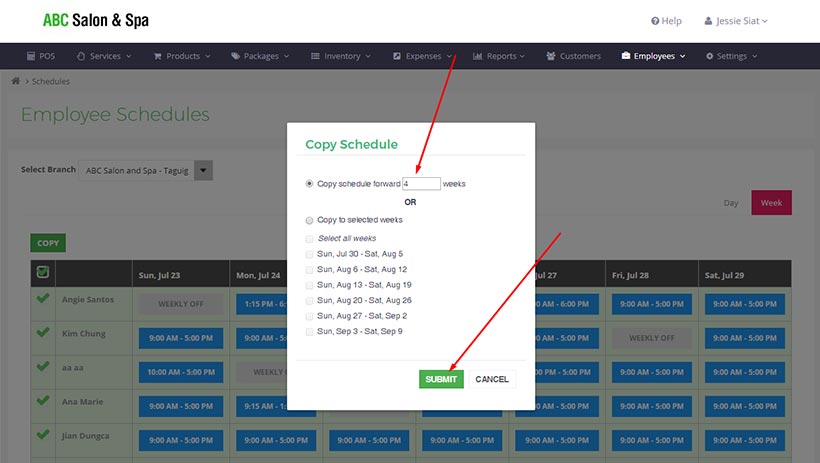
Specify how many weeks you want to copy forward the schedule. Then click SUBMIT
7.) Done!